
This is not only the perfect copycat recipe, it’s a perfect chili recipe, and we have Dave and Wendy to thank for the inspiration! Wendy’s chili recipe wasn’t an accident. It was one of the few original menu items that stood loud and proud when the establishment opened in 1969. Having chili on the menu along with burgers, fries, and milkshakes allowed Wendy’s to stand out from other fast food spots. Apparently one of the reasons chili was put on the menu was to help eliminate food waste by using the leftover burger patties–TMYK! So skip the drive-through, and stay in with this copycat instead. Keep reading on for everything you need to know:
What People Are Saying:
“I made this recipe twice and my family loved it. It’s by far the best chili ever I followed it to the T and it taste amazing 👍🏻. I really recommend it to everyone to make it.” – GreenBee
How To Make Copycat Wendy’s Chili
INGREDIENTS
- Yellow Onion: Yellow onion is going to add a nice savory, slightly sweet flavor and aroma to the chili. Cooking it first helps to add a base flavor to the dish that will go a long way to developing flavor throughout the rest of the cooking process.
- Green Bell Pepper: The bell pepper will soften as it cooks, but retain some of its bite, to provide a nice textural difference in the chili. I prefer a green bell pepper for this chili, but if you want a sweeter pepper, any of red, yellow, or orange bell peppers will work as well.
- Celery: Celery is a secret heavy-lifter of this dish. While celery doesn’t have a super strong flavor it does add a slight crunch and some fresh sweetness to the finished meal. With a dish like chili that is full of heavier ingredients, a light bite of celery is very welcome.
- Tomato Paste: While crushed tomatoes are a large component in developing the strong tomato flavor of the chili, the tomato paste is really where the depth of flavor stems from. Cooking it for a few minutes before adding in many of the other ingredients allows the flavors to strengthen and brings out a nice sweetness that otherwise would be missing from the finished meal. If you opened a new can of tomato paste for this recipe and aren’t sure if you’ll use the rest of the can before it expires, dollop it out into individual tablespoon proportions and freeze them in an ice tray or freezer save bag.
- Ground Beef: Wendy’s classic recipe calls for beef, and I couldn’t agree more. While there is a time and place for a turkey chili or white chicken chili, beef chili is the real deal. It helps the dish feel hearty without having to break the bank.
- Spices: I’m going for a classic spice blend here of chili powder, ground cumin, garlic powder, salt, and black pepper. This makes for a spice base that has a slight bite and a lot of savory, come-back-for-more depth and flavor.
- Crushed Tomatoes: The canned, crushed tomatoes add tomato flavor and liquid that helps to keep the chili at the right flavor and consistency. Use whichever brand is your favorite.
- Kidney & Pinto Beans: The original Wendy’s recipe uses both kidney and pinto beans, so I used both as well. They add a nice, extra meatiness and protein to the chili as well as some extra liquid.
STEP-BY-STEP INSTRUCTIONS
To start the chili off we need to build the base of the flavor. In a large pot, heat oil over medium heat and, once hot, add in the aromatics—onion, bell pepper, and celery—and cook for about 7 minutes, stirring occasionally. Once the aromatics have softened, add in the tomato paste and cook for about 2 minutes, stirring constantly, until the paste darkens to a deep brick red color. Then add in the beef and cook it, breaking it up as you do, for about 6 minutes until it is no longer pink.
Add all your spices into the mixture and mix to combine well. Then pour in the crushed tomatoes and half a can worth of water, swirling around to catch as much residual tomato mixture as possible. Stir the chili mixture again to combine the liquids and solids, and then add in both beans and their liquid and stir to combine again. Reduce the burner temperature to low and allow the chili to come to a simmer, stirring occasionally, for about 40 minutes. The liquid in the pot will reduce some, and this is a good thing, but you still want a good amount to avoid a dry chili. Taste the chili and adjust with any extra seasonings as necessary.
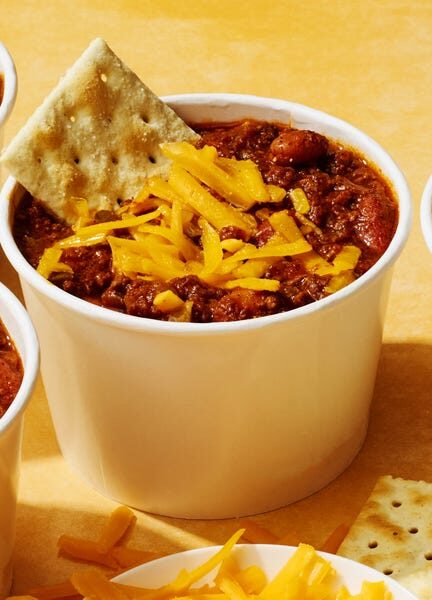
Divide the chili into bowls and serve with cheddar and saltines, or your desired toppings.
The full list of ingredients and instructions can be found in the recipe below.
Recipe Tips
- Change up the toppings: I topped it with scallions and cheese but feel free to use other delicious stuff like tortilla strips, sour cream, or even fried shallots.
- Make it in a Crockpot or slow cooker: Chili is a great meal to make in a slow cooker. After the initial stages of sautéing, everything cooks together in harmony on low throughout the day. Make it in a Crockpot if standing over the stove doesn’t sound appealing.
- Let it simmer: If you’re in a rush, you don’t have to simmer for a full 40 minutes. Just know that the flavor gets better the longer it goes.
What To Serve With Copycat Wendy’s Chili
You’re probably thinking about Wendy’s baked potato, right? This chili would make a great addition to any russet. If you’re craving something crispy then top off your french fries with chili and a sprinkle of cheddar. Chili cheese dogs are always a hit at game night or cookouts too! And, of course white rice is always a good base for something with a little spice.
Storage
After properly cooling, store your chili in an airtight container in the refrigerator for up to 4 days. You could also freeze the chili for a few weeks. When ready to eat, remove the chili from the freezer, thaw in the refrigerator overnight, and reheat slowly, adding a little bit of liquid to loosen it up.


Creating Ghibli-style art has become surprisingly accessible with tools like 지브리 AI. It’s amazing how AI can capture that magical, emotional essence without needing advanced skills. A great blend of tech and artistry!